| Interface | PCIe, USB3.0 |
|---|---|
| Working Distance | Autofocus, Fixed Focus |
3D Inspection Systems
Machine Vision for Robotics
The DepthScan can be mounted on a robot arm and used for part inspection and guidance for painting, sanding, welding, etc. This takes advantage of all of the flexible features of the DepthScan including collecting a full 3d model of a part from a distance, moving closer to capture individual higher resolution point clouds, then stitching them together in order to provide a single high resolution model of the full part. In addition the reprojection capability of the DepthScan allows visible highlighting of any deviations from the design or the desired outcome of the process.
Small Turntable
In this example two DepthScans and a turntable are calibrated, synchronized and used to scan a small spring. Inspection of complex multi-segmented parts like this is very difficult, time consuming and error-prone to accomplish manually. In this system, the individual point clouds acquired from each camera at each rotation angle are stitched together, features isolated and then compared to the GD&T parameters contained in the design files of the part. This process allows for automatic identification of parts that do not meet specification as well as the magnitude of deviation from nominal. With production sampling this allows for early identification of any developing problems attributed to machine misalignment.
Large Turntable
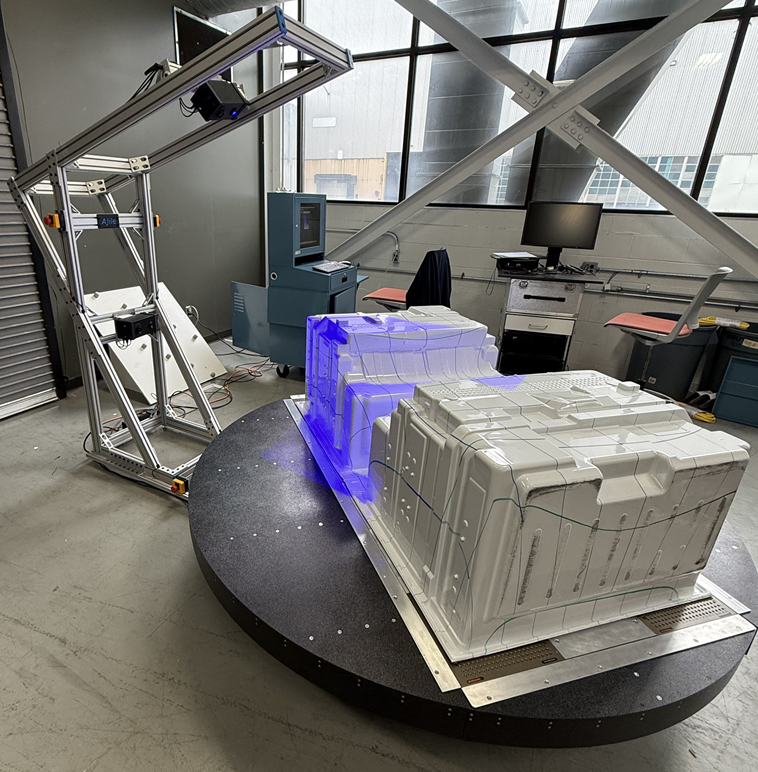
In this example a large turntable and gantry are used to support two calibrated and synchronized DepthScans to inspect large thermoformed parts. The individual point clouds are then stitched together to create a single 3D mesh, which can be compared to the CAD model. In addition, the colored lines on the surface are isolated, segmented, tracked and compared to the reference model to identify any manufacturing process problems arising from mistuned heater elements
SKU: AJ-PR-9191-2
Categories: 3D Imaging, Inspection Systems, Uncategorized

